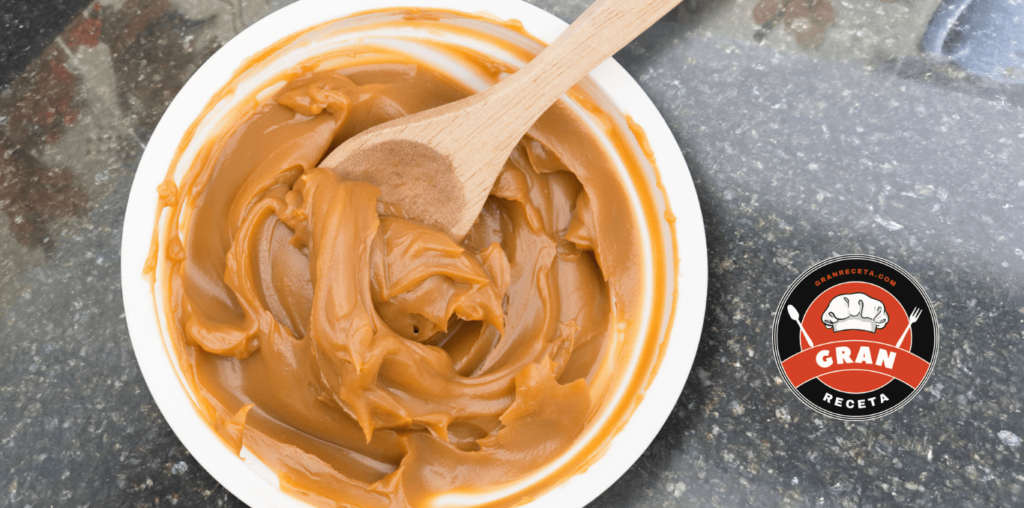

A quart of milk and 1½ cups of sugar give you about 1 lb of arequipe, which means more than half the starting weight leaves as steam. Along the way the milk turns from white to brown with nothing added to color it: that is a Maillard reaction between the lactose and the milk’s own proteins, running slowly in a liquid for the better part of 2 hours. This is dulce de leche made the way it is made in Colombia, where it is called arequipe and eaten on wafers with cheese. Twelve servings, a little over two hours, and the last stretch with a spoon in your hand.
How do you make dulce de leche from milk? Combine 1 quart of milk, 1½ cups of sugar and ½ tsp of baking soda while cold, bring to medium heat and reduce 60 minutes, stirring now and then. Stir constantly for the final 45 minutes until it reaches 225 °F or a spoon leaves a track on the pan bottom. 125 minutes for 12 servings.
Why milk turns brown
Nothing is caramelized here in the strict sense. What happens is a Maillard reaction between the lactose in the milk and the proteins the milk already contains, the same browning that colors a seared steak, except it runs for 2 hours in liquid instead of seconds in a pan.
Baking soda is the lever. Half a teaspoon raises the pH of the mixture, and Maillard browning moves faster in an alkaline environment, so the color and flavor arrive sooner. It works without it too, just paler and slower. More is not better: a full tablespoon leaves a soapy aftertaste.
Reading the set
The temperature of the mixture climbs as water evaporates, so a thermometer is really telling you how much water is left. At 219 °F it is a pouring sauce; at 225 °F it spreads and holds its shape, which is what this recipe aims at; at 234 °F it sets hard once cold.
Without a thermometer, use the track test: draw a spoon across the bottom of the pan, and it is ready when the track takes about 2 seconds to close over. Either way, remember that it thickens substantially as it cools, so stop while it still looks a shade looser than you want.
The last half hour
For the first hour this nearly cooks itself; stirring every 5 minutes is enough to stop a skin forming. From minute 70, once half the volume is gone, everything changes: the base is thick, heat transfer gets aggressive, and thirty seconds of inattention is enough for it to catch.
That is why the pan matters. A heavy base spreads the heat and buys you margin; a thin one concentrates it into hot spots and scorches where you cannot see. Burning is the one failure on the list with no remedy, because it flavors the entire batch.
Three routes to the same jar
Most English-language recipes for dulce de leche start from a can of sweetened condensed milk, and the result is a real thing, just a different one: firmer, sweeter and flatter than this. If you go that way, the one rule that matters is safety, and it is not optional. The can must stay completely submerged for the full 40 minutes at pressure, or the full 2 hours of simmering, and it should never be heated sealed and dry.
Cajeta, made with goat’s milk, is the third route. Same method, tangier result, and worth knowing about if you find goat’s milk easier to get than patience.
What it is, nutritionally
By calories, arequipe sits where honey and jam sit: according to the USDA it runs 315 kcal per 100 g, jelly 266 and honey 304. The difference is in what else is there. Because this is reduced milk, it carries 6.84 g of protein in every 100 g, more than twenty times what honey has.
That does not make it health food. It does explain why it satisfies differently, and why in Colombia it is eaten in small quantities with cheese or on wafers rather than by the spoonful.
Who this recipe is for
- If you have no thermometer → use the track test; ready when it takes 2 seconds to close
- If it came out grainy → blend it hot and strain it; the crystallized sugar dissolves
- If it came out stiff → return it to the heat with ¼ cup of hot milk and stir until smooth
- If you want it darker → 15 minutes more on low heat, not more baking soda
- If you are short on time → the canned-milk method takes 40 minutes at pressure, with the can kept fully under water
Make ahead, storage and how to use it
In a clean, sealed glass jar it keeps 3 weeks refrigerated, since the sugar acts as a preservative. It firms up cold, so take it out 20 minutes before spreading, or stir in a spoonful of hot milk.
It does not freeze usefully, and does not need to. Beyond spreading it, it is the filling for stuffed fritters, a layer in flan and the standard partner to fresh cheese in Colombia, which is the pairing worth trying first if you have only had it on toast.
What goes wrong
High heat at the end. It catches on the bottom and the burnt taste cannot be corrected.
Scraping the pan walls when jarring. Crystallized sugar goes into the jar and turns the batch grainy.
Judging the set while hot. It thickens a lot cold; what looks perfect in the pan becomes a brick.
Milk near its expiry date. It curdles when heated and there is no recovering it.
A thin pan. Hot spots scorch the base before the rest reaches 225 °F.
Variations
With cinnamon. One stick through the whole cooking, removed at the end, in the style of manjar blanco from the Valle del Cauca.
With panela. Swap ½ cup of the sugar for grated panela, giving a darker result with a molasses edge.
With goat’s milk. The classic Santander version, sharper and more distinctive.
Salted. A teaspoon of salt instead of a pinch, about 400 mg of sodium more per batch, for the sweet-salty contrast that suits cheese.
What to serve it with
In Colombia this goes on wafers, beside fresh cheese, or straight off the spoon, about 2 tablespoons at a time. It is also the filling for stuffed Colombian buñuelos in December and the usual companion to a stovetop flan or a bowl of Colombian rice pudding.
On a dessert table it sits with Colombian natilla, a caramel pineapple upside-down cake and a tray of fudgy brownies with it swirled through the batter, and at breakfast it goes on bread or on a Colombian cheese arepa, which is the sweet-salty combination Antioquia likes best.
Frequently asked questions
Why is mine grainy? Crystallized sugar, almost always from the pan walls. Blend it hot and strain it.
How much does a quart of milk make? About 1 lb, which is 12 servings of 2 tablespoons.
Can I use canned condensed milk instead? You can make a similar sweet in 40 minutes at pressure, but it is a different product in texture and flavor, and the can must stay fully submerged.
What does the baking soda do? It raises the pH and speeds up Maillard browning, so the color arrives sooner. Half a teaspoon is enough.
How long does it keep? Three weeks refrigerated in a clean sealed jar. Sugar does the preserving.
Nutrition
Per serving of 2 tablespoons, about 1.4 oz, calculated with the USDA entry for dulce de leche:
- Calories: 125 kcal
- Protein: 3 g
- Carbohydrates: 22 g
- Fat: 3 g, of which 2 g saturated
- Fiber: 0 g
- Sodium: 50 mg
- Sugars: 20 g
According to the USDA, dulce de leche carries 315 kcal, 6.84 g of protein and 49.74 g of sugar per 100 g. It is concentrated milk and sugar, and the sensible portion is small: two spoonfuls on a wafer or beside cheese, rather than a jar and a fork in front of the fridge.
The first time I made this I looked away for ten minutes near the end and lost a quart and a half of milk at once, with the house smelling of burnt sugar for two days. My Colombian mother-in-law later explained that she never makes it alone: she puts someone next to the pan to talk to, and that is the whole technique. I do the same now and have not burned a batch since. Josnaisis.