
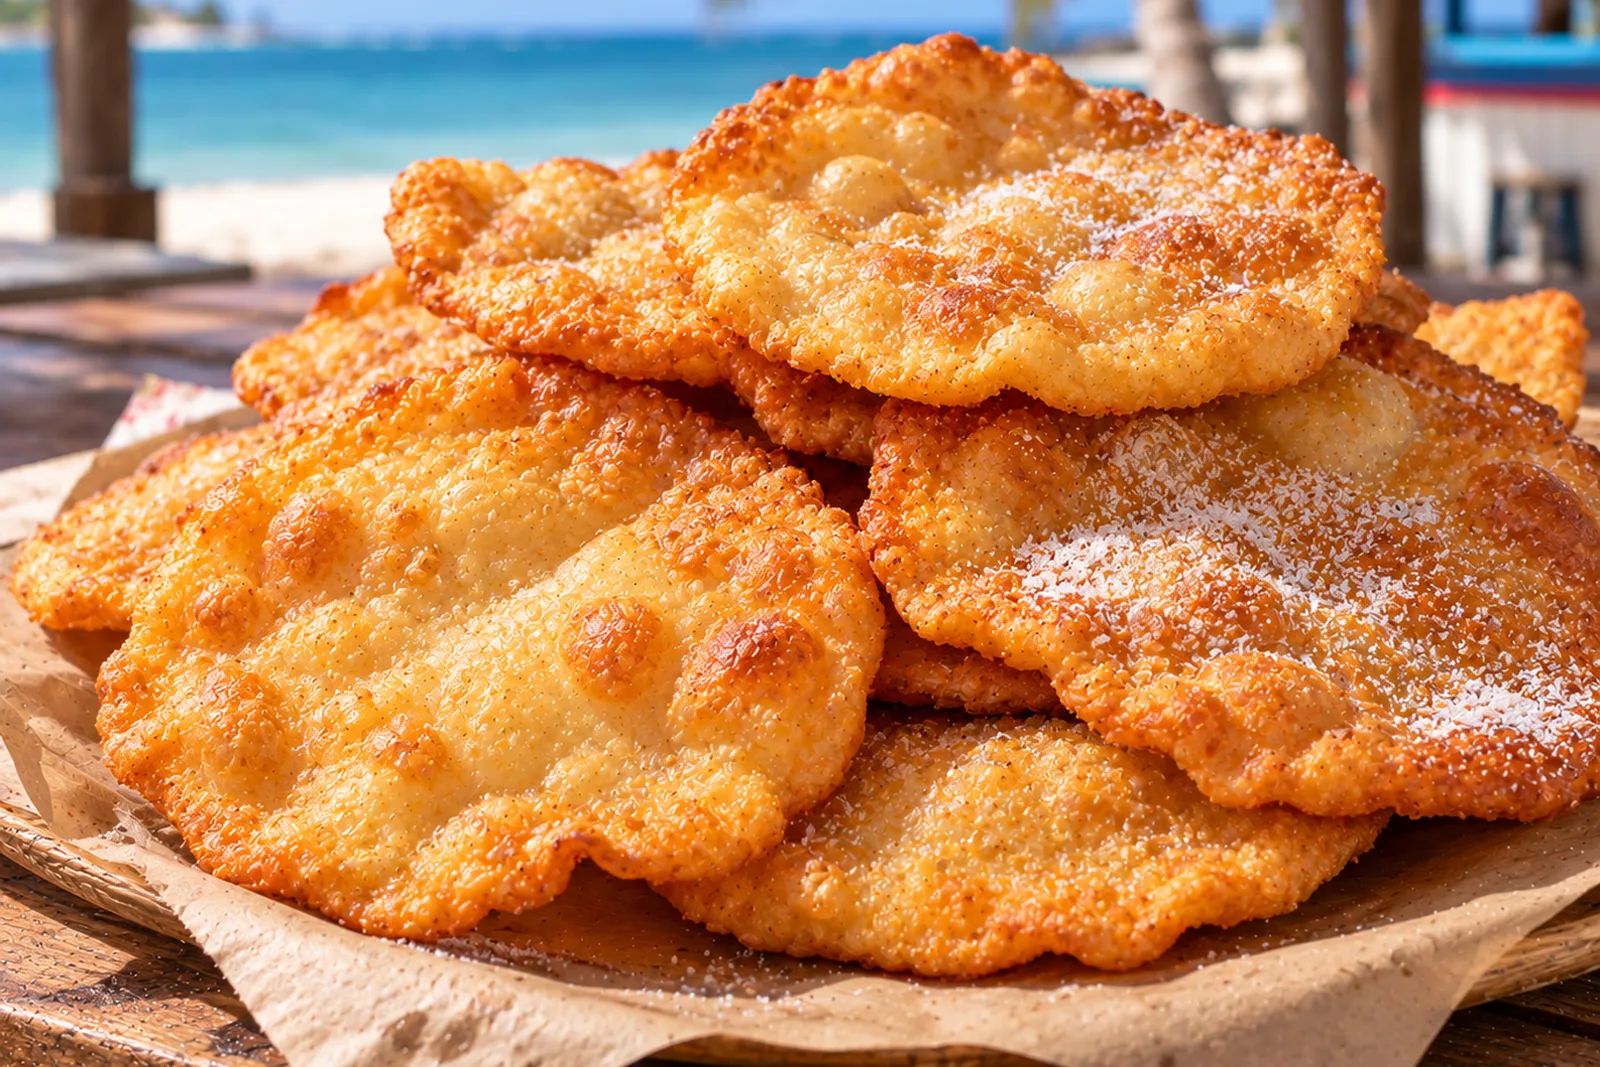
Yaniqueques (yah-nee-KEH-kehs) are the Dominican Republic’s crispiest street snack: a plain dough of flour, salt, a little baking powder and oil, rolled so thin you can nearly see through it, then fried until it blisters and snaps like a cracker. The name is usually traced to the English johnnycake, a cake believed to have reached the island in the 19th century with migrants from the English-speaking Caribbean. Beyond the name, there’s little left in common with the cornmeal johnnycake of New England or the baked johnny cake of the Bahamas. This recipe makes 16 rounds from 2 cups of flour, with the thickness, oil temperature and visual cues that get them crisp every time.
What a yaniqueque tastes like
How do you make yaniqueques? Mix 2 cups (250 g) of flour with ½ tsp baking powder, 1 tsp salt, 3 tbsp oil and about 7 tbsp (100 ml) of warm water, knead 2 to 3 minutes and rest the dough 20 minutes. Roll 16 balls to 1 to 2 mm (1/16 in), cut a few slits and fry at 350°F (175°C) for 1 to 2 minutes per side until golden. 80 minutes for 4 servings.
Think of a very thin, unsweetened fried flatbread with no soft crumb at all: golden, bubbly on the surface and brittle from edge to edge. In the Dominican Republic they’re a beach snack (Boca Chica is famous for them) and a breakfast or afternoon bite with hot chocolate or café con leche, eaten plain with coarse salt, dipped in ketchup or showered with sugar.
If you’ve made Colombian hojuelas, you already know the texture: another dough rolled to 2 mm and fried until it shatters, but sweetened with orange juice. The dough itself is close to homemade flour tortillas, and the opposite of Chilean sopaipillas, which are ¼ in thick, made with pumpkin and fried until soft inside.
Time and skill. 80 minutes from bowl to plate, 20 of them resting and 35 at the stove. Easy: the only things that take attention are rolling thin enough and keeping the oil hot.
Ingredients and US/UK swaps
The recipe makes 16 rounds of 4¾ in (12 cm), 4 per person as a snack. The dough weighs about 14 oz (400 g). The ratio to remember: for every 100 g (¾ cup plus 1 tbsp) of flour, 40 ml (2¾ tbsp) of water and 16 g (generous 1 tbsp) of fat. For a party of 12, triple it and knead in two batches.
| Ingredient | US | UK | What changes |
|---|---|---|---|
| Flour | All-purpose | Plain flour | Bread flour makes a springier dough that fights back when you roll it |
| Self-rising flour | Works | Self-raising works | Skip the baking powder. US self-rising already has salt, so skip the salt too; UK self-raising has none, so keep it. Slightly puffier |
| Fat in the dough | Vegetable oil | Sunflower oil | Butter or lard at the same weight: richer, a little flakier, no longer dairy-free with butter |
| Frying oil | Corn or peanut | Sunflower or groundnut | Any neutral oil works; corn and peanut are the Dominican favorites |
| Liquid | Warm water | Warm water | Milk works, but the sugar in it browns the rounds faster: pull them a bit sooner |
Equipment. A rolling pin, a deep 10 in (26 cm) skillet or wide pot, a slotted spoon or tongs, a wire rack or paper towels and, ideally, a deep-fry or candy thermometer. One liter (4¼ cups) of oil in a 10 in skillet gives you about ¾ in (2 cm) of depth, enough for the rounds to float. No rolling pin? A clean, floured wine bottle does the job.
Step by step, with the cues that matter
1. Mix and knead briefly
Whisk the dry ingredients first so the baking powder is evenly spread, then add the oil and the warm water. Flours drink differently, so add the extra water by the tablespoon. Knead 2 to 3 minutes, just until smooth and no longer tacky. Overworked dough turns elastic, shrinks every time you roll it and fries up tougher.
2. Rest 20 minutes
Covered, at room temperature. The rest relaxes the gluten, and that’s what lets you roll it nearly transparent without it springing back. If it still shrinks, give it 10 more minutes.
3. Roll paper-thin and cut slits
Divide into 16 balls of about 25 g (scant 1 oz). Roll from the center out, giving the dough a quarter turn after every pass, until it’s 1 to 2 mm (about 1/16 in) thick and you can see the shadow of the counter through it. Sticking? Dust with a little more flour or roll between two sheets of parchment. Rustic shapes are normal; for neat rounds, trim around a small 4¾ in (12 cm) plate or lid.
Cut 3 or 4 slits of ¾ in (2 cm) in each round, or prick it all over with a fork. Steam escapes through them; without them the round puffs into a pillow and fries unevenly, pale on top and dark underneath.
You can keep rolling while the oil heats. Lay the rounds out in a single layer on parchment, never stacked, or they’ll stick together.
4. Fry at 350°F (175°C)
Heat the oil over medium-high to 350°F (175°C). No thermometer: drop in a scrap of dough. If it floats up right away surrounded by bubbles, you’re ready; if it sits on the bottom, wait a couple of minutes.
Fry 2 at a time. The round bubbles hard as it goes in and blisters within seconds. After 1 to 2 minutes the underside is golden: flip and repeat. How to tell it’s done:
- Color. Even gold on both sides, with the blisters a shade darker.
- Bubbles. The fierce bubbling at the start is water leaving the dough. When it calms down, the round is dry.
- Feel. Lifted on the slotted spoon it’s stiff and doesn’t droop, and after a minute on the rack it snaps cleanly.
All 16 take 8 batches, about 35 minutes including the pauses for the oil to recover. Let the oil recover to 350°F (175°C) between batches, and if they’re browning too fast, turn the heat down, but don’t let it fall below 330°F (165°C).
5. Salt or sugar while hot
Sprinkle as soon as they come out, while the surface is still glossy, so it sticks: ½ tsp of flaky salt or 2 to 3 tbsp of granulated or powdered sugar covers all 16.
Troubleshooting soft, greasy or puffy yaniqueques
- Soft and greasy. The oil dropped below 330°F (165°C), usually from crowding the pan. Two per batch in a 10 in skillet.
- Puffed up like a pillow. Not enough slits, or they didn’t go all the way through.
- Bready instead of crisp. Rolled too thick. Anything over 2 mm keeps a soft center.
- Dough shrinks back. Overkneaded or underrested. Cover it and wait 10 minutes.
- Dark outside, pale patches. Oil too hot or uneven thickness. Lower the heat and roll evenly right to the edge.
Allergens and kids. Contains wheat (gluten). Made with oil, it’s egg-free and dairy-free; with butter it contains milk. Nothing spicy, and kids tend to love the sugared ones, but keep them well away from the pan: oil at 350°F (175°C) burns instantly.
Sweet, savory or thick, which version to make
- Sugared. Dusted with granulated or powdered sugar while hot, for breakfast or an afternoon snack with coffee or hot chocolate.
- Salted. Flaky salt, eaten plain or dipped in ketchup. This is the beach version, and they’re also served alongside a lunch plate of rice, beans and chicken.
- Topped. Some street vendors now top or fill them with ham and cheese, chicken or vegetables. Topping works better: a thin yaniqueque behaves like a tostada and cracks if you try to fold it.
- Thick, like fried bread. Rolled to ¼ in (5 to 6 mm) and fried 3 to 4 minutes per side: golden outside, tender inside. You’ll get about 5 rounds of 4¾ in (12 cm) from the recipe.
- Beach-size. Divide the dough in 4, roll to 10 in (25 cm) and fry one at a time in a very wide pan with more oil.
Building a Dominican spread? Dominican mangú with the three hits is the savory breakfast from the same kitchen. For more crisp fritters from the Caribbean shore, Puerto Rican bacalaítos are a thin salt cod batter fried until the edges crackle, and Venezuelan fried arepas are the corn version that puffs up for stuffing.
Make ahead, storing and re-crisping
Best eaten fresh. If you’re making them ahead, cool them completely on the rack, uncovered. Warm yaniqueques sealed in a container steam themselves soft within minutes.
Storing. Once cool, keep them in a tin or airtight container lined with a paper towel, at room temperature. Mine stay crisp for about 2 days; after that they’re still edible but lose their snap and the oil starts to taste stale. Skip the fridge, which softens them. Sugared ones go soft sooner than salted ones.
Re-crisping. Oven or air fryer at 350°F (180°C) for 3 to 4 minutes, until they’re stiff again when you lift them. The microwave turns them leathery.
The frying oil. If it hasn’t darkened or smelled burnt, strain it once cool through a fine sieve or cheesecloth and keep it covered for another batch of fried dough.
Yaniqueques FAQ
Are yaniqueques the same as Jamaican johnny cakes? No. Jamaican johnny cakes, also called fried dumplings, are thick, round and soft inside, closer to the thick version above. Yaniqueques share the name’s origin but are rolled paper-thin and fried crisp.
Can I bake them instead of frying? You’ll get a crisp flatbread, but not a yaniqueque: the blisters and the shattering texture come from the hot oil. I haven’t found a baked version that matches it.
Can I make the dough without baking powder? Yes. They still crisp up, but come out denser with fewer blisters, closer to a fried cracker. The ½ tsp (2 g) makes them lighter.
Nutrition per serving
Per serving (4 rounds of 4¾ in / 12 cm, salted, no sugar or dip), calculated from the recipe quantities plus an estimate of the oil absorbed during frying:
- Calories: 449 kcal
- Protein: 6 g
- Carbohydrates: 48 g
- Fat: 26 g, of which 4 g saturated
- Fiber: 2 g
- Sugars: 0 g
- Sodium: 622 mg
That’s about 112 calories per yaniqueque. Of the 100 g of fat in the whole batch, around 60 g is oil picked up in the pan, which is one more reason to keep it at 350°F (175°C): cooler oil means greasier rounds. A tablespoon of powdered sugar per serving adds about 30 calories.
My rule for yaniqueques is the one I use for any thin fried dough: if I can’t see the counter through it, it isn’t ready for the oil. I roll every round before I turn on the burner, so I’m never juggling the pin and the slotted spoon at once, and I split the batch in two, half salted and half sugared, because at my table nobody agrees on which is better. Josnaisis.